
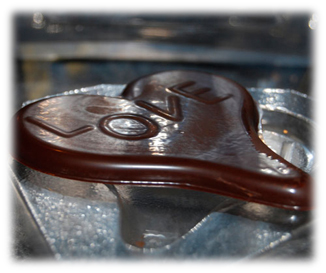
Maybe you have always wondered how to make your own custom chocolate mold. Perhaps it was for your wedding, or maybe a birthday or holiday celebration. There are many different ways that custom molds can be made but the easiest and cleanest looking would be to use food grade silicone when making the molds.
You must first decide what you are going to want to cast out of chocolate. For this example I will use a small plastic heart. After deciding what you are going to want to cast, you must make a frame for the mold. To start, place double sided tape on your item and place it to a flat surface like a plank of wood. Make sure when doing this that any details you want captured on your item, must be facing away from the wood.
When building walls for your frame, I find that legos or rectangular pieces of wood larger than the item you are casting work well. Build a frame around your item leaving at least a half of an inch around all the sides of your item for clearance. Build the walls of the frame at least a half of an inch higher than the item you are casting. To hold the walls of the frame to the board, use more double sided tape and be sure it is secure.
 Following the directions on your food grade silicone, mix slightly more than the amount you will be casting. If you have extra frames handy now would be a good time to make an extra mold, because most silicone’s must be used within 45 minutes of mixing. Allow plenty of time for this mold to cure and dry. This will take up to 24 hours. Once dry carefully remove the walls and peel back the mold. This food safe technique is easy and lets you create custom molds with confidence.

